Products You May Like
Corporate espionage? Covert research facilities? All in a day’s work when you’re in The Outer Worlds. Here’s how to complete the “Doom that came to Roseway” quest, and all the related subquests – “By His Bootstraps”, “Vulcan’s Hammer”, and “The Amateur Alchemist”.
To continue your mission to help the Hope colonists, you need to get to Monarch – and that means getting your hands on a Navkey to Stellar Bay. The Groundbreaker’s kindly smuggler Gladys has one for sale, but it’s not cheap; 10,000 bits not cheap.
With dollar signs in her eyes Galdys gives you a tip off to a distress signal coming from the Roseway facility, an allegedly abandoned Auntie Cleo test sight. She’ll pay for any corporate secrets you can dig up, but there’s more in play here.
There’s enough money to be made if you just go and complete the sidequests in Roseway, rather than selling them to Gladys. So it’s still worth your time.
Your choices in this quest aren’t quite as binary as in “Comes now the Power”, but there are still multiple paths. It’s also a quest that’s referenced in The Outer World’s best ending.
The are two Journal quests to keep tabs on here: “The Distress Signal”, which points you towards the corporate secrets, and “The Doom that came to Roseway” which advances the station’s story. Check both while you’re in Roseway.
The Doom that came to Roseway quest guide
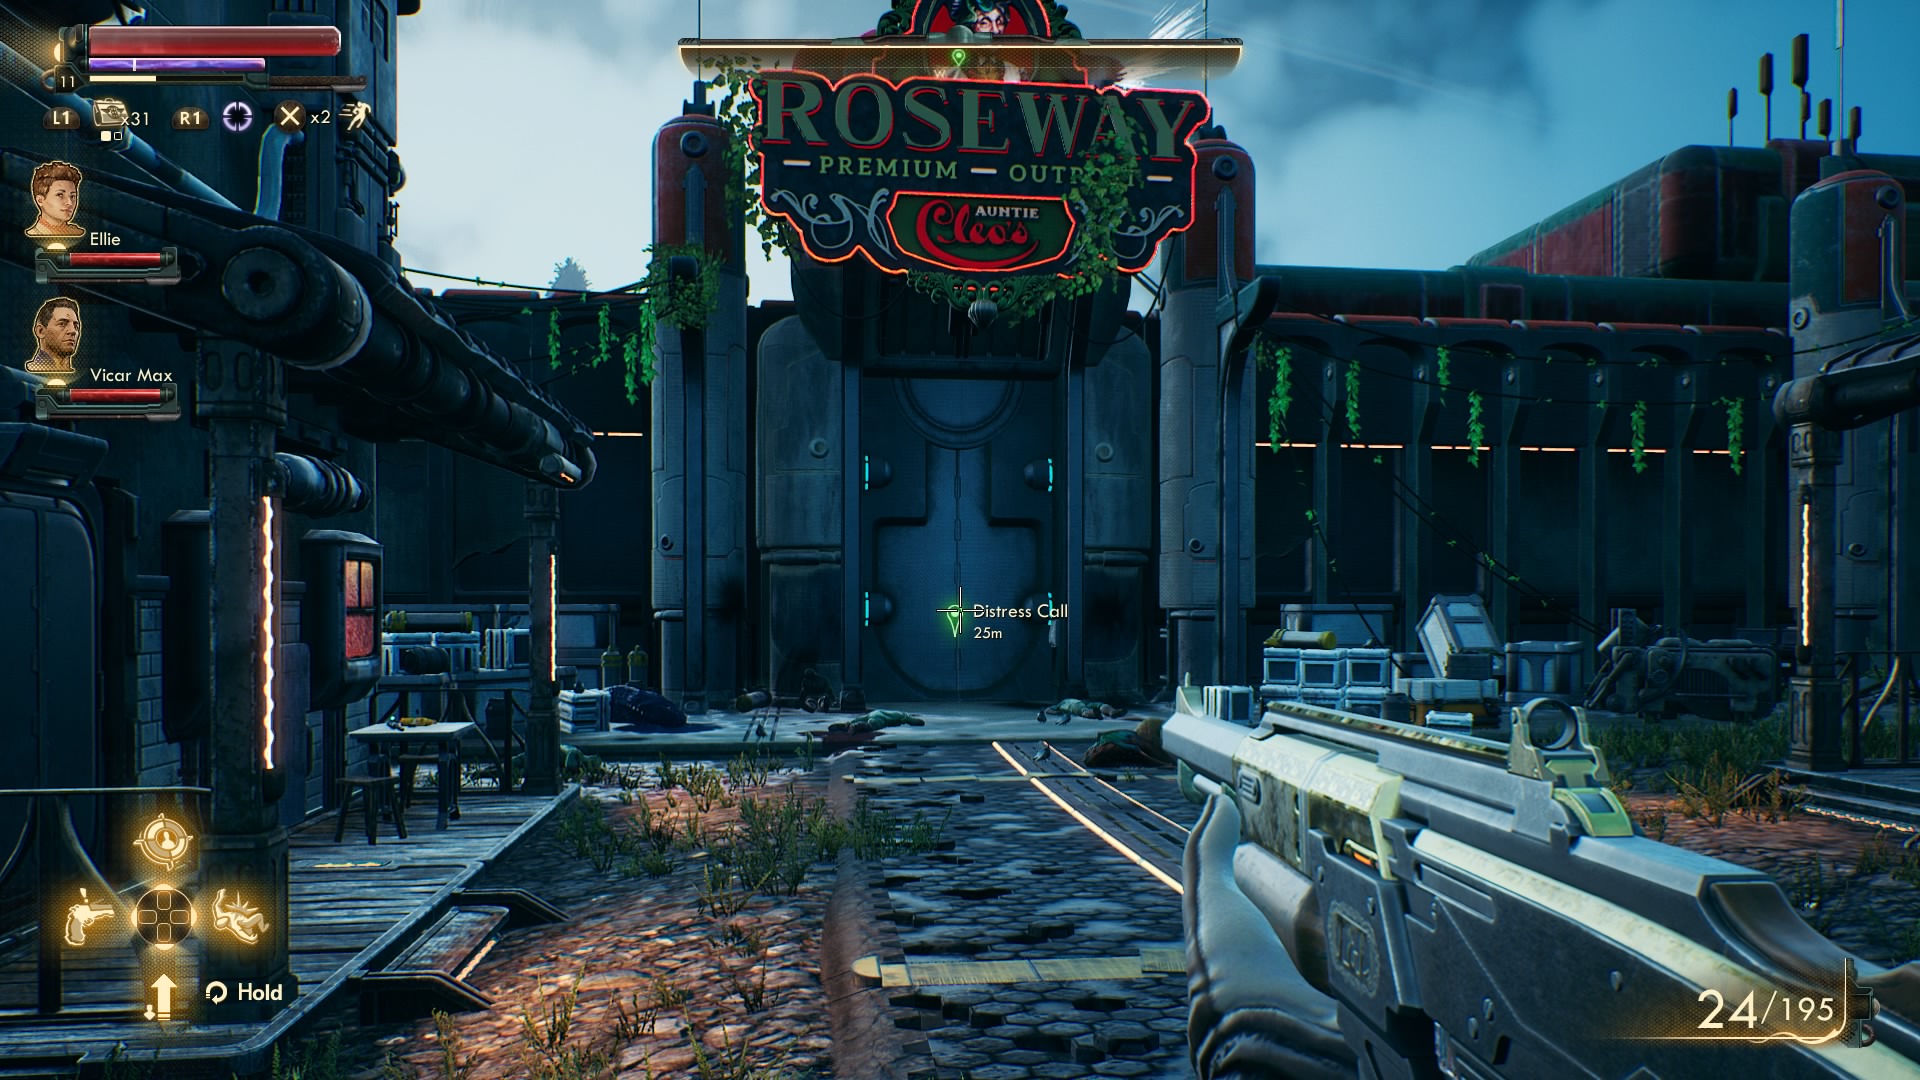
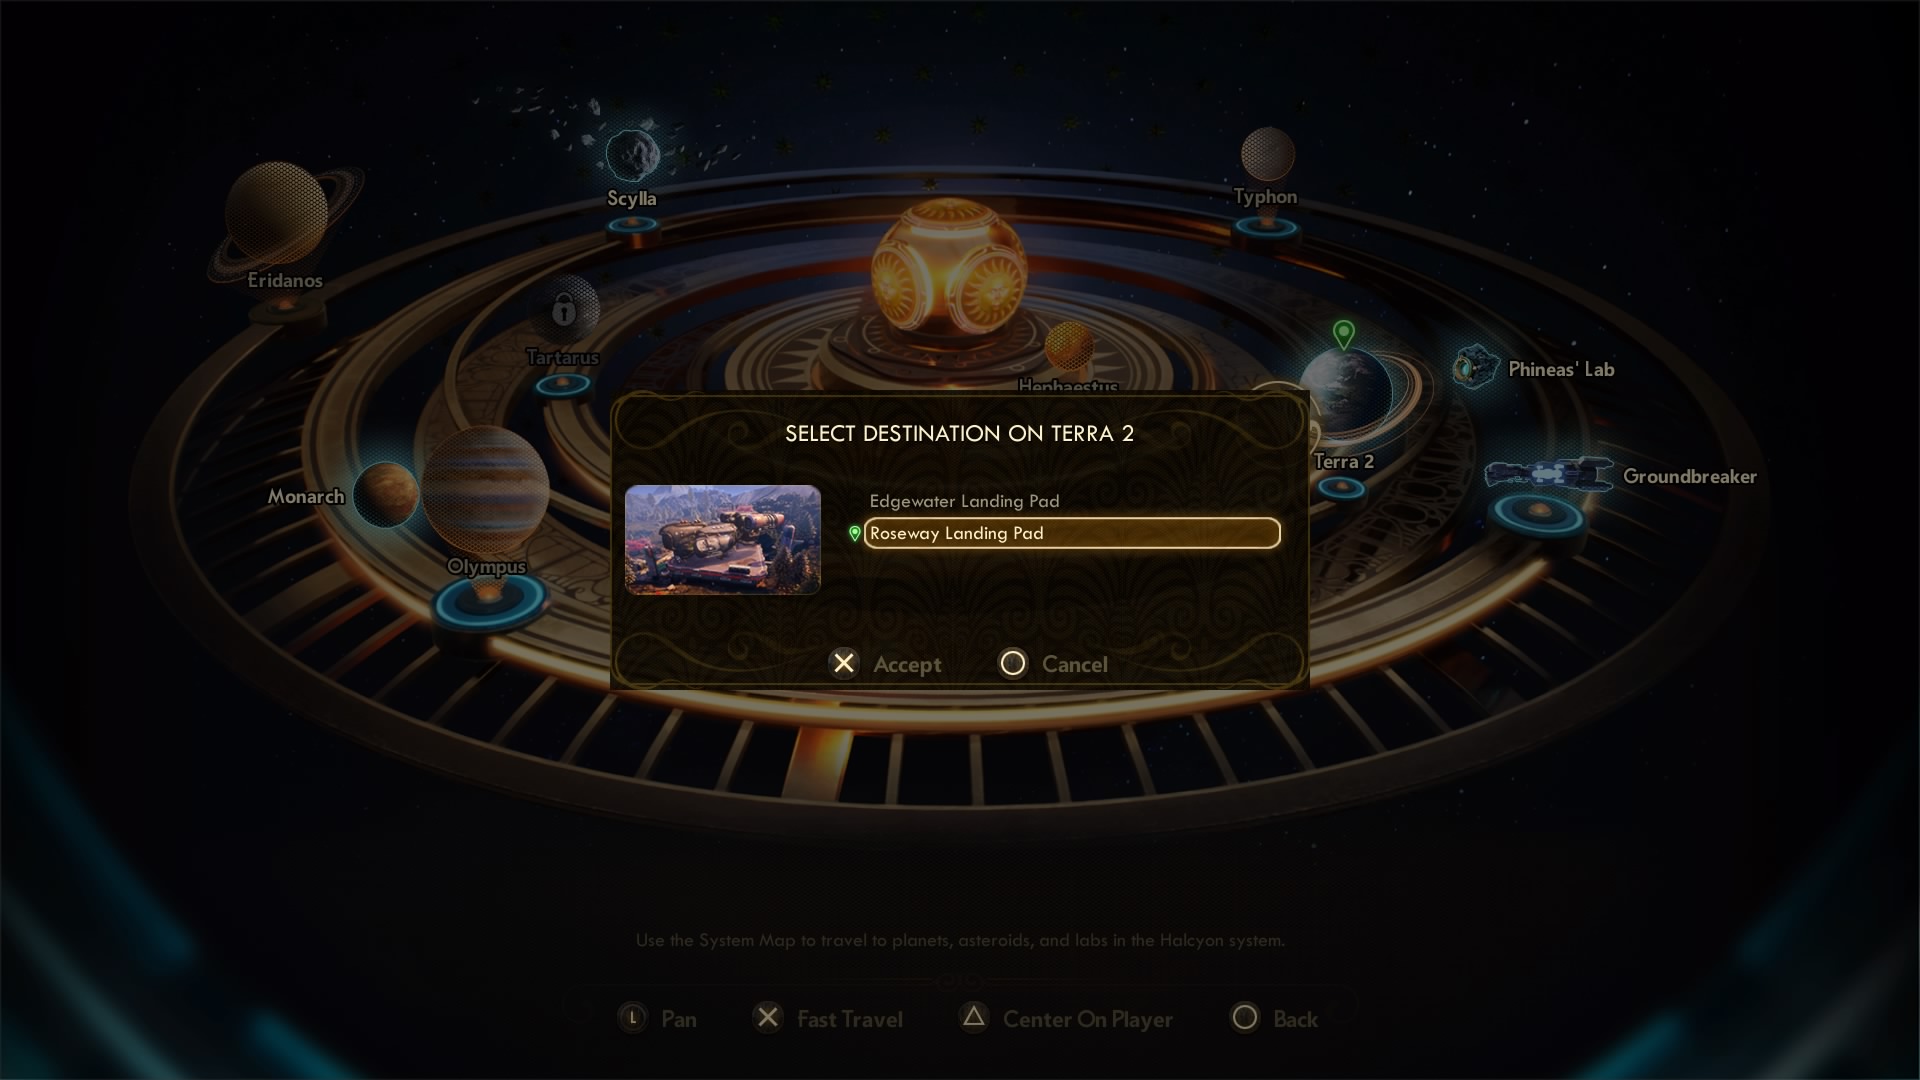
Once you receive the tip off from Gladys, return to the Unreliable and speak to ADA to play the distress signal, then go to the galaxy navigator map, click Terra-2 and then the Roseway landing pad.
Exit the ship and stride out into the spooky deserted landscape. Follow the quest marker forwards, taking out any enemies on the way and you’ll come up to a large walled research base.
Transition inside and you’ll meet some friendly Auntie Cleo corpos. Speak to Berke for some context on your situation if you wish, but the main man you need to speak to is at the base of the tall tower in front of you.
Head inside the building and speak to Anton Crane.
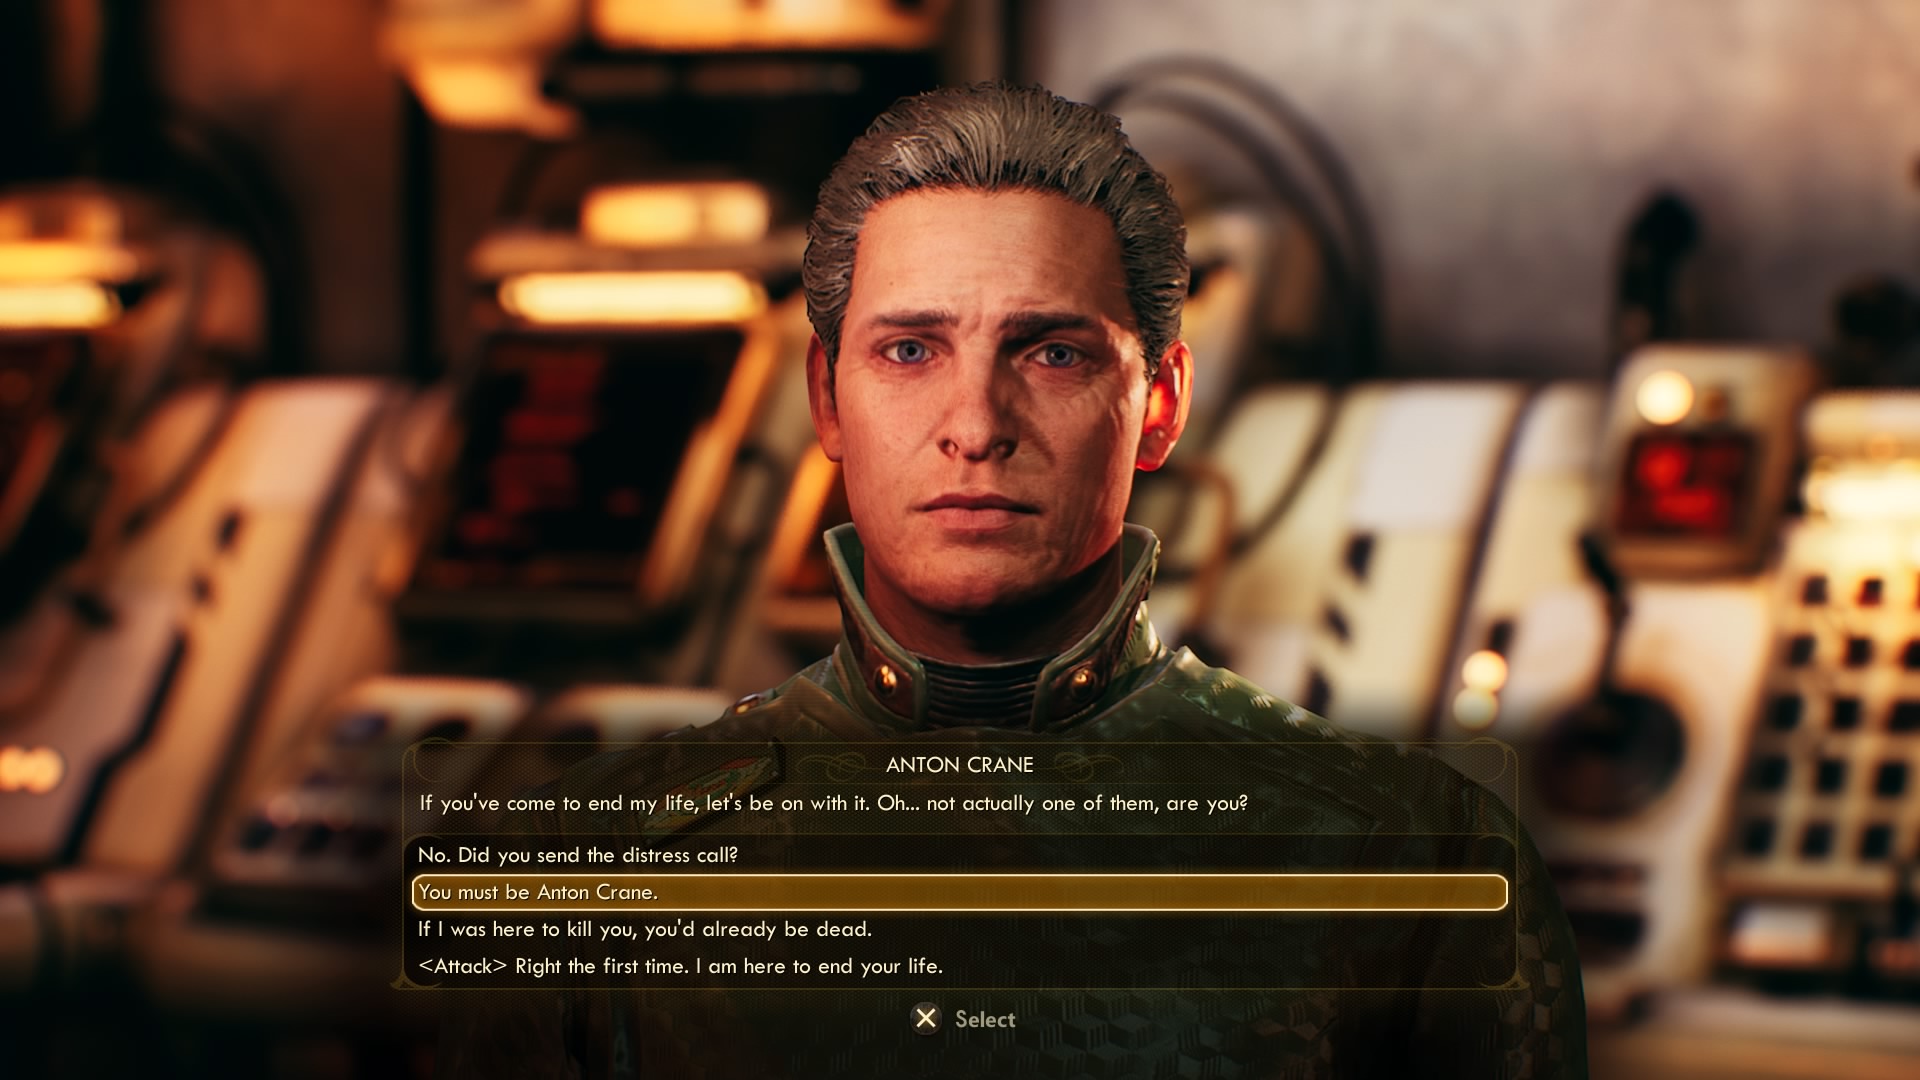
Ask him about his predicament and why he sent the distress signal. There’s an Intimidate check of 30 to bully out the true nature of his research here, but it’s not totally necessary.
Agree to return his research, turf out the outlaws who’ve overrun the facility, and offer to take care of the Raptidon problem as well. No problem.
When Jameson comes up in conversation, ask about him and offer to stage a rescue – it’s important for the resolution of a couple of quests. This gives you the “By his Bootstraps” quest.
Now that’s everything from Crane, there are two more scientists to speak to in Roseway. Mark “The Distress Signal” in your Journal to get markers for them.
Vaughn Cortes is at the back of Roseway. Ask him about his research – and choose a Science check of 30 if you wish – then agree to help close down the experiment he left running in the main lab. This is easy to do at the same time as grabbing Crane’s.

Next, close to Roseway’s door you can speak to Orson Shaw. He’s a weapons engineer that needs some schematics from an overrun lab – another secret you can steal.

There’s another Science check of 30 to pass in this conversation, but agree to collect the plans regardless.
By His Bootstraps quest guide
It makes the most sense to go and save Jameson first. Not only is it close, but you’ll be able to grab the door code for Orson’s quest – as well as the Acid Steeper to add SAM to your crew – at the same time.
Follow the quest marker to the Auntie Biotics lab and enter through the front door.

In front of you there’s a front desk with a terminal. Walk towards it and pick up the “Cleo Lab Office Keycard”. Now turn around and hack the computer terminal to lift the hallway lockdown. Don’t forget to go into the messages and read them all. This gives you the storage facility key code. You can boost your hack skill with Vicar Max as a follower (here’s how to complete his follower quest, The Empty Man).

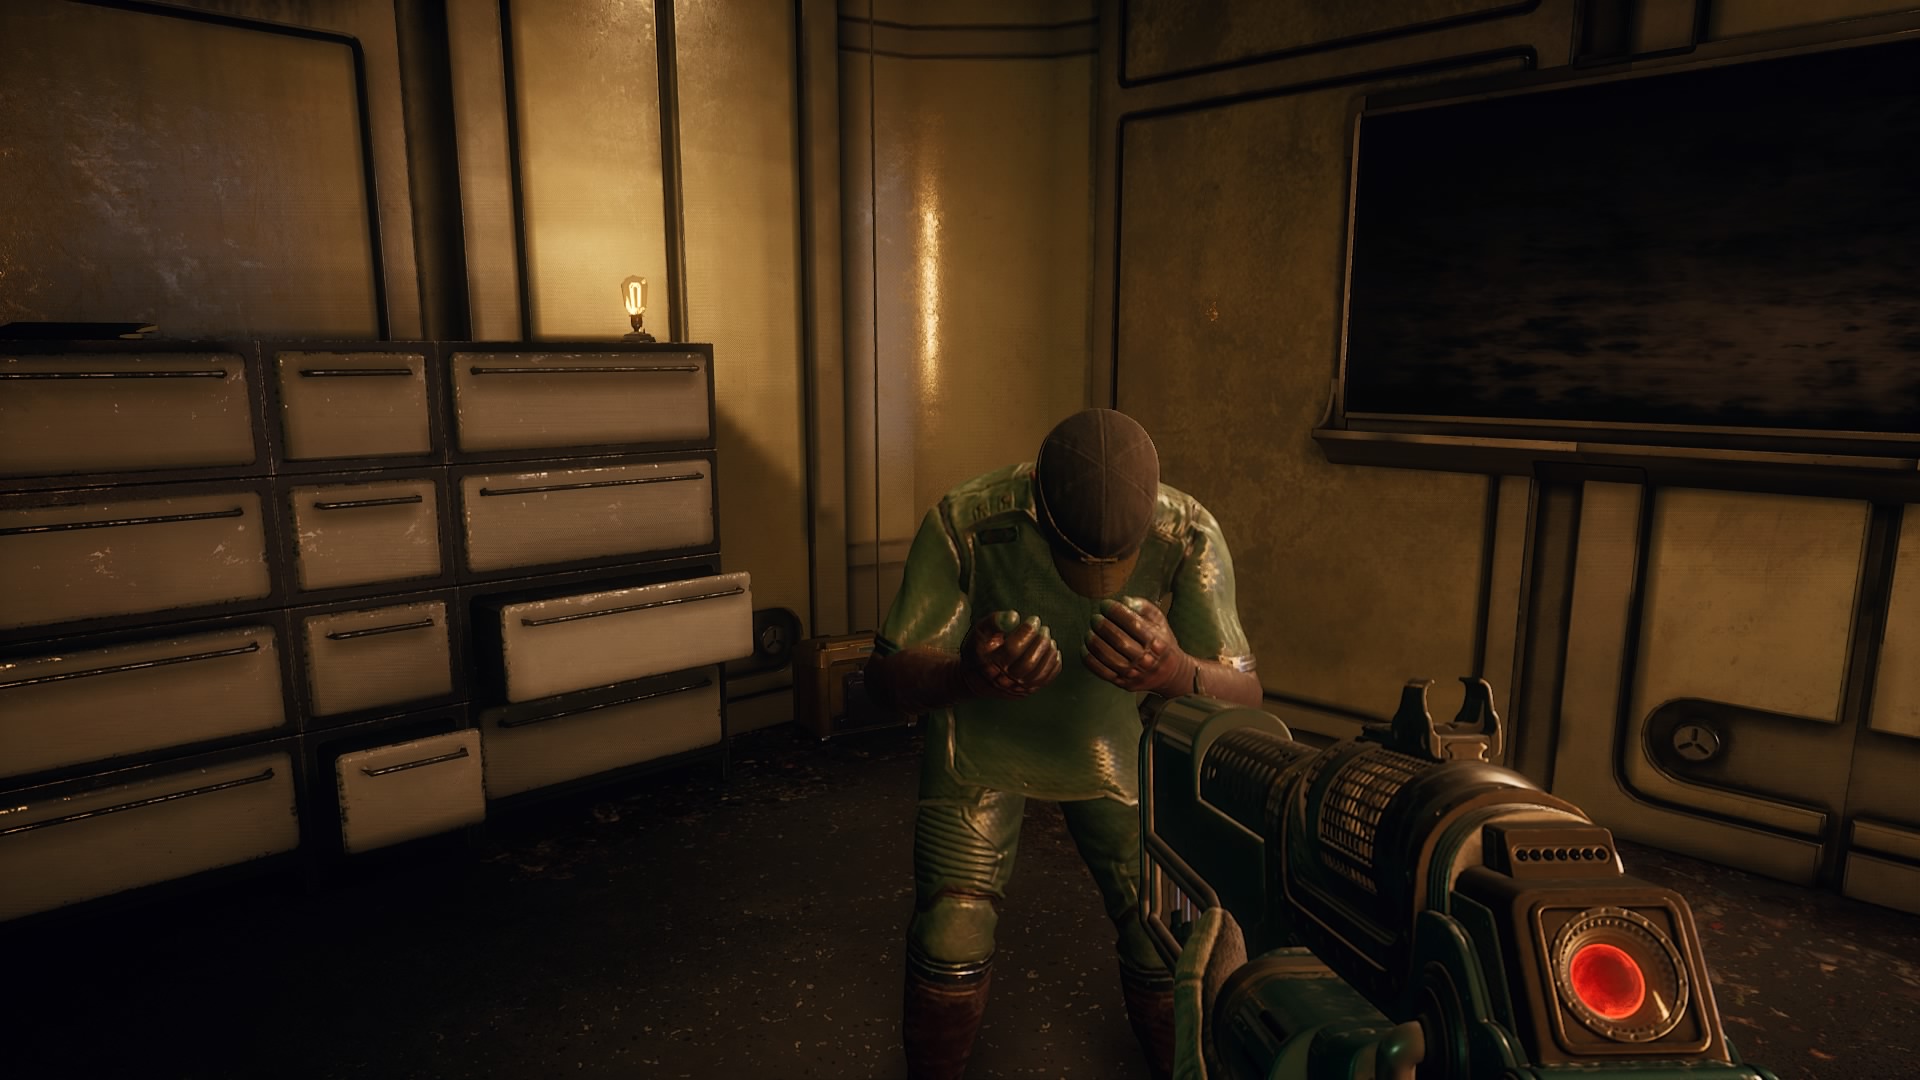
Saving Jameson is just a matter of clearing out all of the enemies in the rest of the area as quietly or loudly as you like. He’s hiding upstairs behind a closed door.
Once you make it up there, speak to him until he’ll return home. Follow him back and speak to Anton to turn in the quest.
Vulcan’s Hammer quest guide
Next on your agenda are the weapon schematics – and the acid steeper.
These are found in the eastern storage facility so follow the marker on your map to get there.
Enter the building through the side door next to the workbench outside and you’ll wind up in a room with a vending machine.

Sneak over towards the quest marker and you’ll see an Armory note on a key pad – read it, but you should be able to get through the door thanks to your previous work.

On the shelves to your left you should find the Acid Steeper.

Continue around the corner and down the stairs and you’ll find Orson’s lab. Affixed to the wall are some plans for a FORCE pistol, pick them up, then retrace your steps outside.

You can now either return to Roseway and your ship to build SAM and turn in the schematics, or press on to the main covert lab.
A peaceful conclusion to The Doom that came to Roseway
It is possible to deal with the outlaws and raptidons without too much violence. However for one check you will need a Lockpicking skill of 15 or a Persuade level of 45, then for a second check you’ll need either Lie 50, Intimidate 51, or Persuade 31.
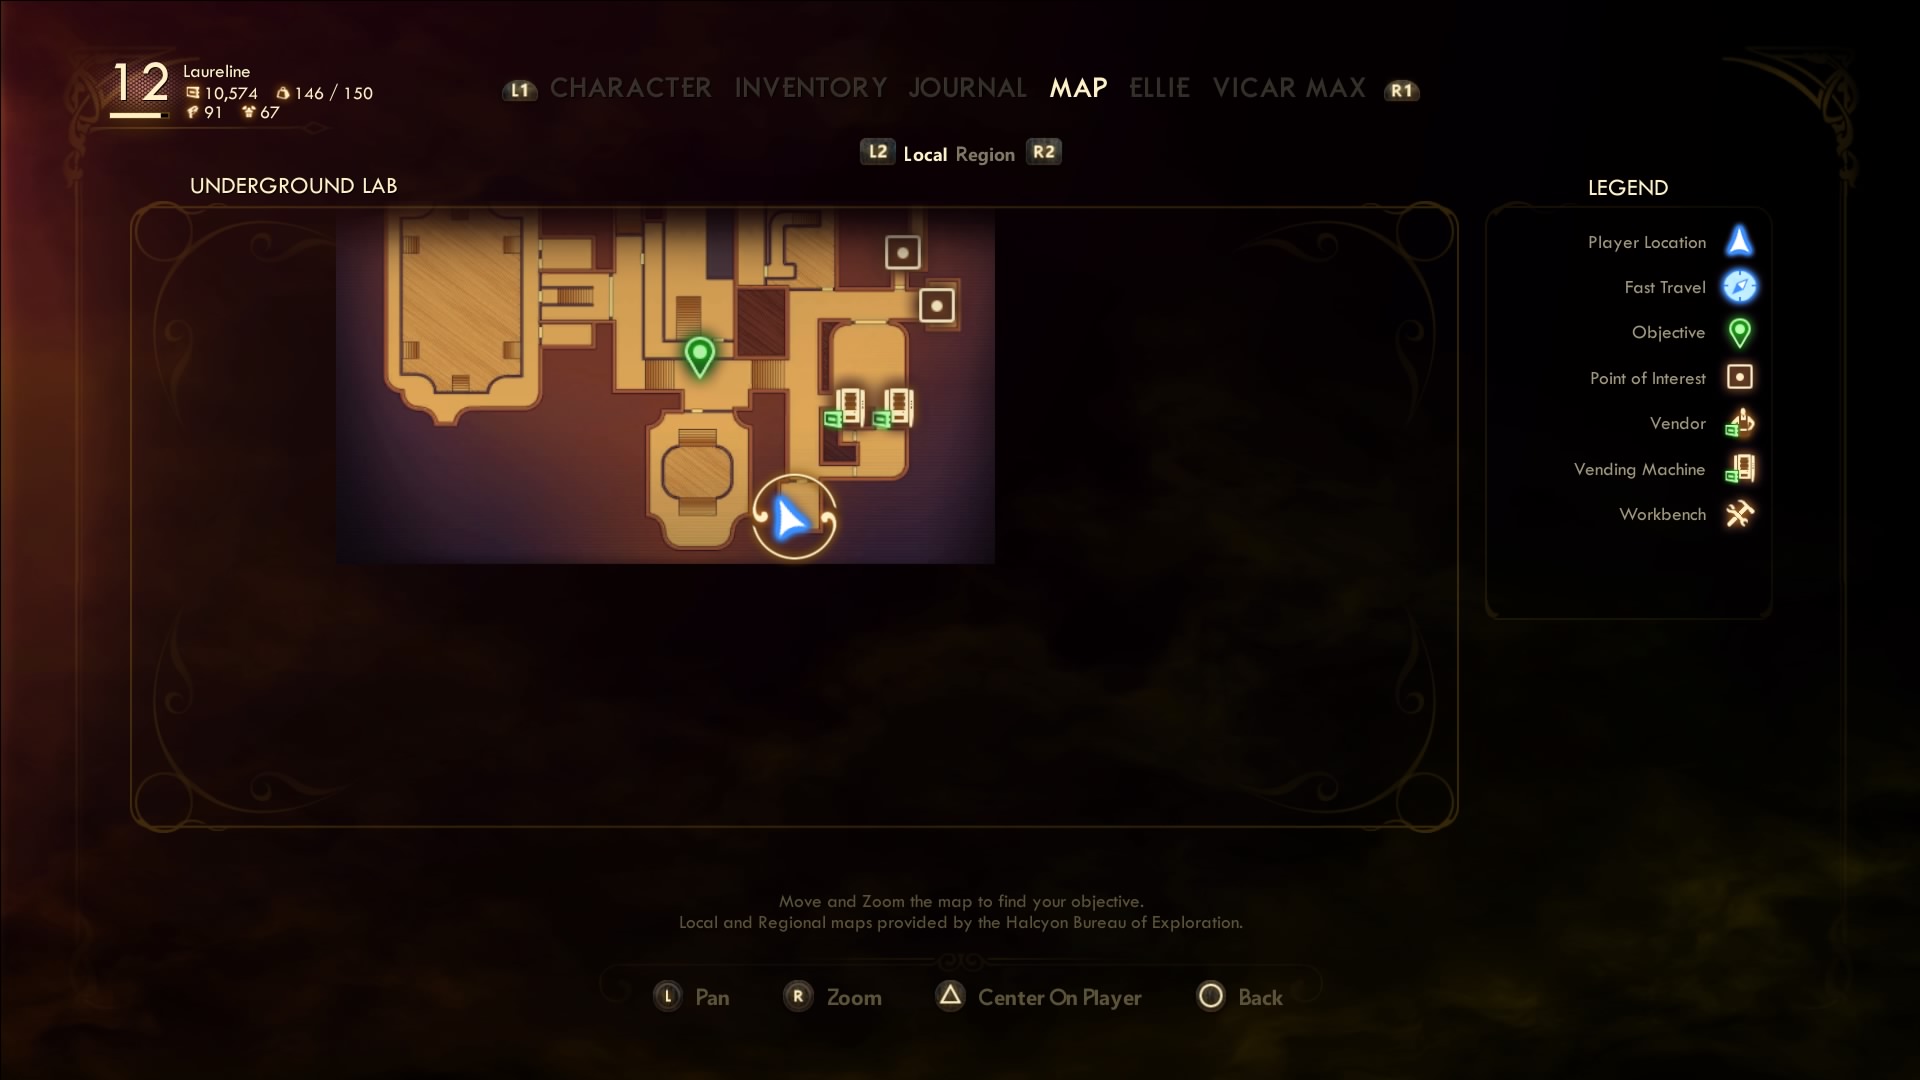
The covert lab is in the extreme south of the area. Make your way there along the road.

Outside you can speak to Lillian if you wish. She asks you to return her lost collectible from some Raptidon Colossi nearby. It’s quick and simple to complete if you’re feeling feisty – your reward is a decent payout and a unique flamethrower.
Either way, once you’re done head inside the conveniently labelled covert lab through the front door.
Speak to Porter on the other side and he’ll fill you in that the outlaws are trapped downstairs without a key card. Ask how he’s so sure they’ll stay stuck and pick the Persuade option if you want, but you’ll be able to break into his office later.
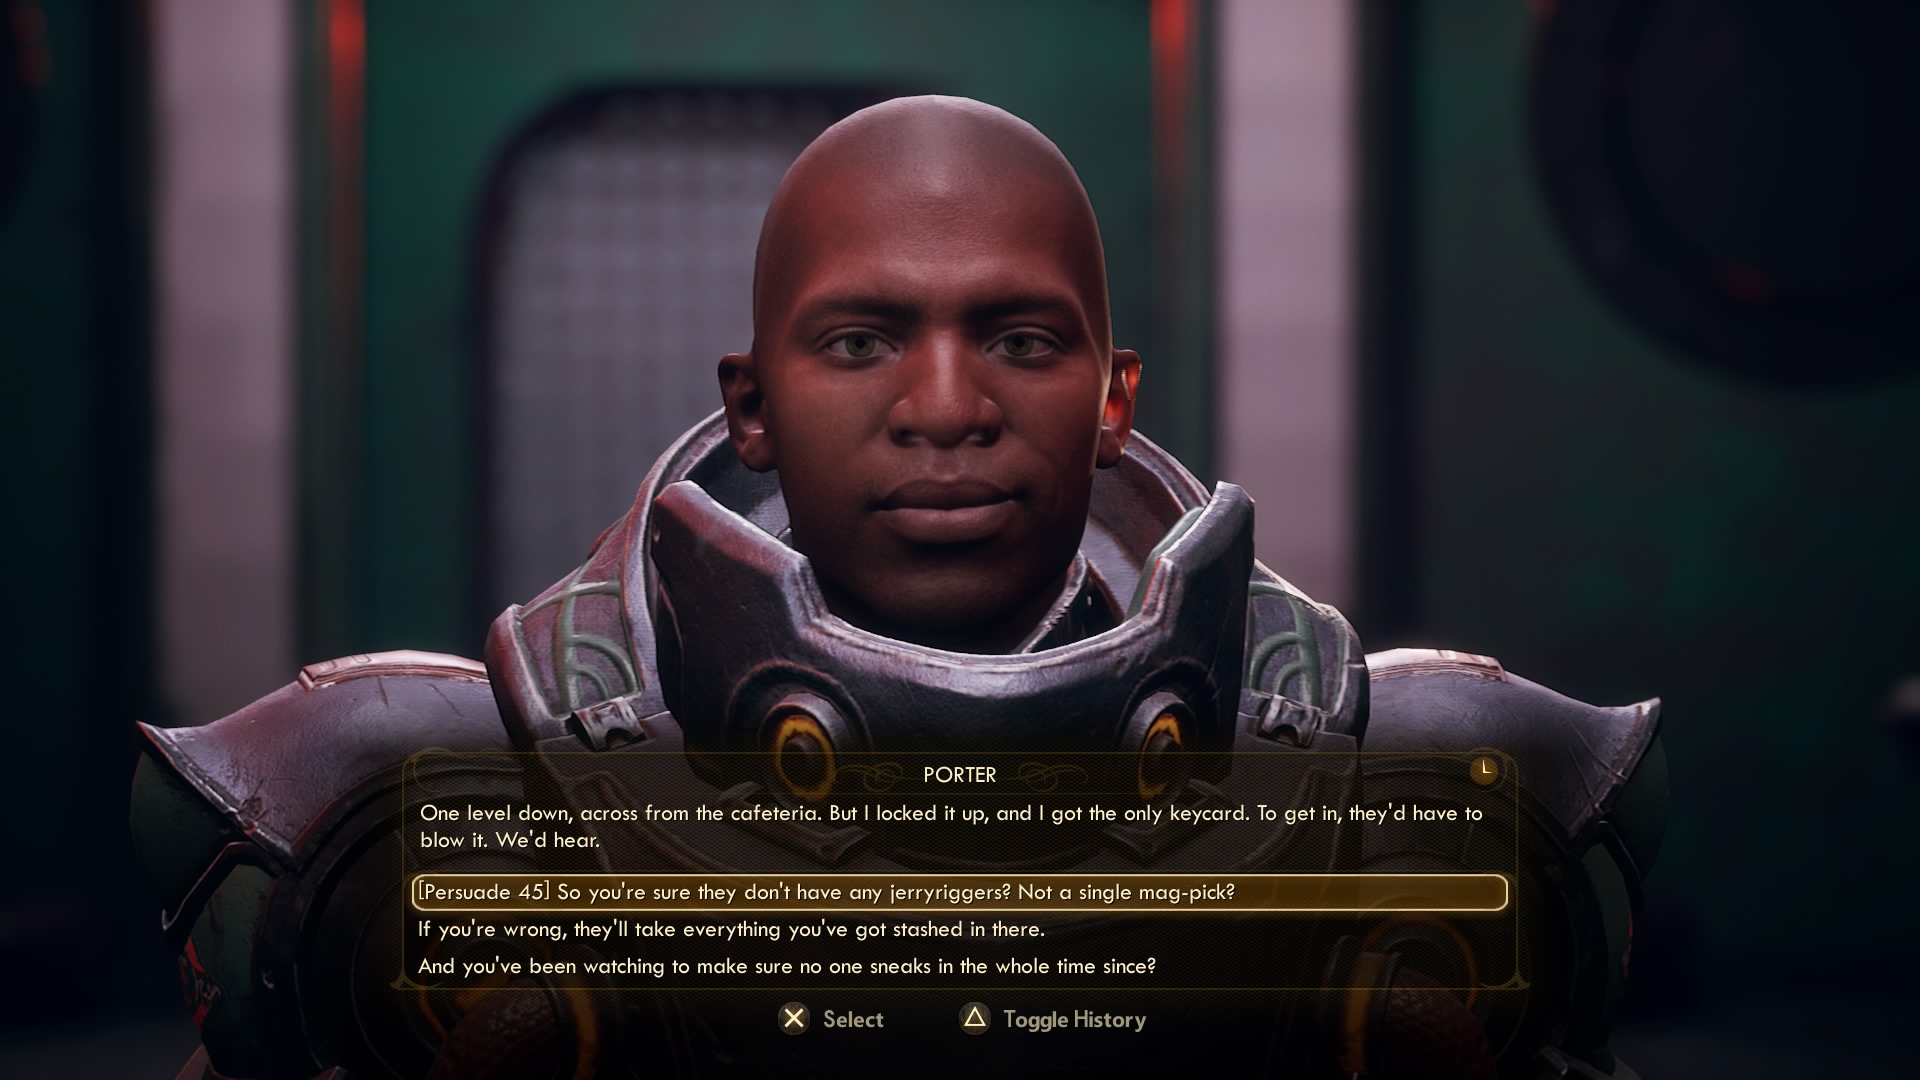
Go through the door to the left of Porter, turn right, kill the mechanical sentry and go down the stairs. Kill all the enemies at the bottom, then head towards the quest marker on the left.
As you walk towards it, you’ll see a locked gate on your left. This is Porter’s office. Pick the lock (using Parvati’s skill boost if you’re short) and use the terminal inside to print yourself a new key card. Loot the rest of the room then go back to the research quest marker.

The safe if empty so you get a new objective to retrieve the research.

You now need to search the two storage rooms on the south side of this floor for “Sedative Gas Canisters”.
There are two out in the open, and one behind a Lockpick 40 door. Don’t worry if you can’t open the door to get the third one, there are more chances later.
All in all you need three of these canisters for a later quest step.
Once you’ve picked those up, head down the slope towards the Anton’s Data quest marker. Here you’ll speak to Cassandra O’Malley.
Say that “Anton wants a problem fixed”, then agree to negotiate if she hands over the research. Say she needs your help more. She needs a keycard, which you got in Porter’s office, and a clear path to the exit, which you’re working on with the canisters.
The Amateur Alchemist quest guide
Once you’re done talking to Cassandra turn around and open the door to the room behind you – this is Vaughn’s experiment. Go over to the right and interact with the terminal. If you have Science 45 you can recalibrate the equipment for a double dose, but your otherwise “complete” the experiment to give to Vaughn, or “purge” it for no reward.

Remember to pick up the “Rapti-prod” from the side in the middle of the lab; it’s a unique melee weapon you can’t get anywhere else.
Back to the Outlaws
Now that’s dealt with go back towards Cassandra and head left up the slope and around the corner.
The room on your left is filled with raptidons and is where you need to release the gas. If you couldn’t unlock the door to the third canister earlier there’s another out in the open just to the right of the door here.
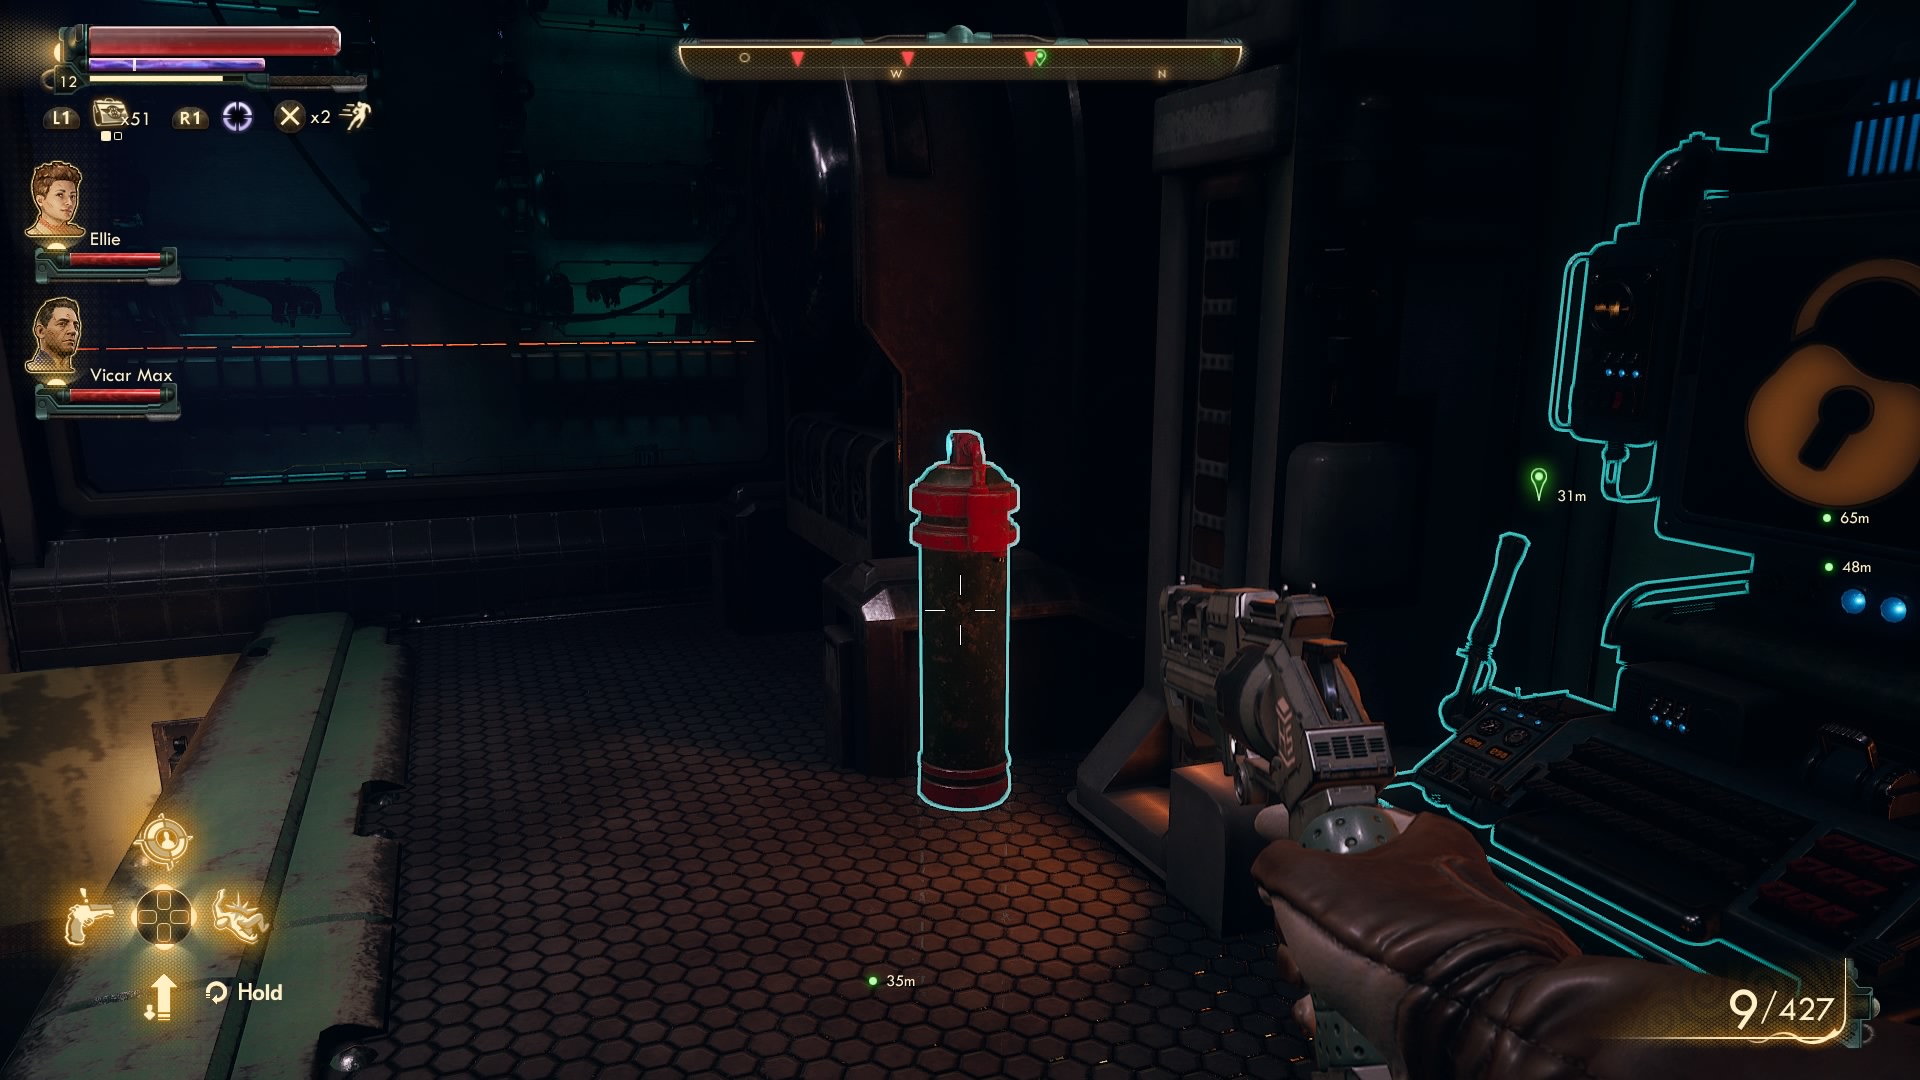
With all three canisters in your inventory, sneak down and open the door to the raptidon room. You then need to sneak over to the three blue cylinders on your right and interact with them.

It seems pretty impossible to do this next bit without being spotted, so once you’ve stored the gas sprint over to the terminal on the other side of the room and release it. This solves the raptidon problem.
With that done, turn around and go into the room behind you when Cassandra is trapped. Use your key card on the pad and engage her in conversation.

Despite the help you’ve given her, one last double-cross is on the cards. This is when you need Lie 50, Intimidate 51, or Persuade 31 to resolve the situation without violence, but still come away with the research.

Should you sell the secrets to Gladys or give them to Crane?
If you take the corporate secrets to Gladys, you get about 7,500 bits for your trouble. However, if you return them to Crane, Vaughn, and Orson, you get that same amount along with unique weapons and armor.
Personally, I like to collect those sort of things so I went with the scientists. Doing this doesn’t botch the quest from Gladys either, she’s perfectly accepting when you come back empty handed.

Giving the secrets to Gladys fails The Amateur Alchemist, Vulan’s Hammer, and The Doom that came to Roseway.
Now that you’re finished at the lab, head back to Roseway and speak with all the scientists in turn. Avoid shaking down Orson for extra bits because it lowers your Auntie Cleo reputation.

When you’re done take you well-earned bits and items back to The Unreliable and set off to buy the Navkey from Gladys.
Also, if you chose to return the schematics to Orson he’ll get in touch with you later down the line to offer another unique weapon. Pop back to Roseway and he’ll hand it over.
Once you reach Monarch there are plenty more quests on offer, including “Canid’s Cradle”. On the new planet you also gain access to two new Science Weapons from the Void.